Henrik's tube amp builds
Tremolux
This was my second amp build, made in 2003–2004. I first planned on doing a Fender 5E3 Deluxe, which is one of the most popular models to build, but decided on the 5E9 Tremolux just for the added tremolo; otherwise it is essentially a 5E3.
The sound of this amp is fabulous and it's the one I've used the most through the years, both for live and recording. Great clean and great distortion. Volume on 9–10 and a P90 equipped Gibson can get you an awesome fuzzy Mississippi Queen kind of sound. It goes from there all the way down to clean chime. With low output Strat or Tele pickups, the gain is more evenly distributed across the volume knob; using P90s or humbuckers it often starts to distort (in a nice way) at 2.
Again, as with my P1, I would not recommend using this amp build as a blueprint for your own project, because it's far from professional. (For example, it is not recommended to attach the mains ground to one of the power transformer screws. But then again, it hasn't budged after 10+ years of usage.)
I used the original Fender scematics and layouts as starting points and drew my own layout with some help from Hoffman Amp's Deluxe layout. For parts, I used essentially the same sources as for the P1, and price-wise it amounted to around $460, including the cab hardware and all.
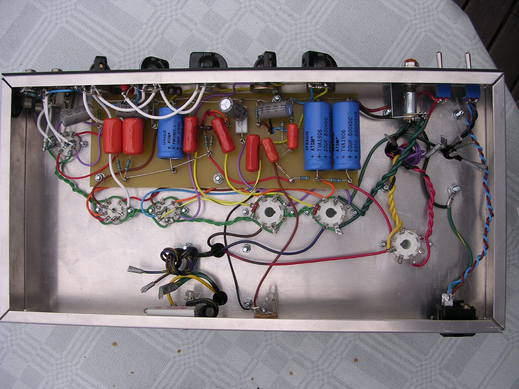
The biggest improvement over the P1 project is that everything is cleaner and neater, although there's plenty of room for improvement. To some extent I used better and more expensive parts, but it has the same basic layout as the P1, with the board in front near the pots and the tubes in the middle. The trem section is right between the filter caps and the PI, consisting mostly of orange drops and resistors, connected to the footswitch jack in the back.
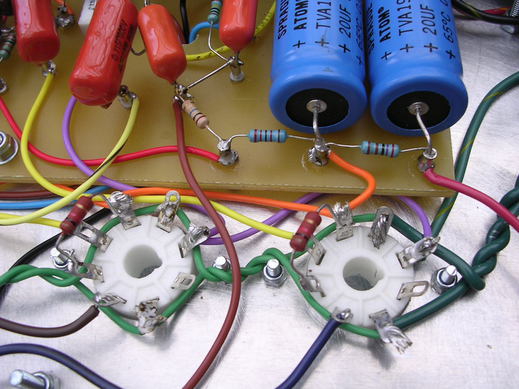
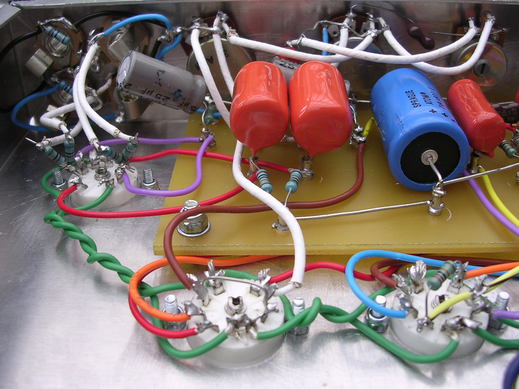
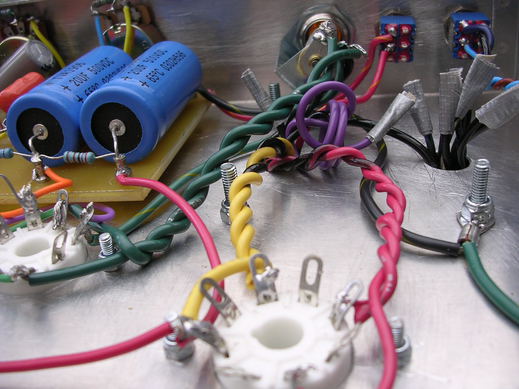
Seen above are the power tube sockets, filter caps and part of the trem section (upper left). The original Fender layout uses more under-board wiring, but I did a little of that too, visible between the orange drops above.
It is not recommended to lead the heater wires (green ones) around the sockets as I've done, which may contribute to noise. A suggested way is to keep the wires twisted as much as possible and lead them over the socket. A great technique is to pre-twist them by attaching one end (of both wires) in a power drill and the other in a vise and slowly run the drill until you get a perfect helix. I didn't use this method for this amp, but despite doing a half sloppy job with the heater wiring, I haven't had any problems with noise at all.
This amp uses Hammond 372BX and 1608 transformers and a 5Y3GT (or 5U4) rectifier tube heated by the 5 VAC secondary. In addition to the sheer vibe of 1955, it's also nice to be able to regulate the B+ voltage by using different rectifier tubes.
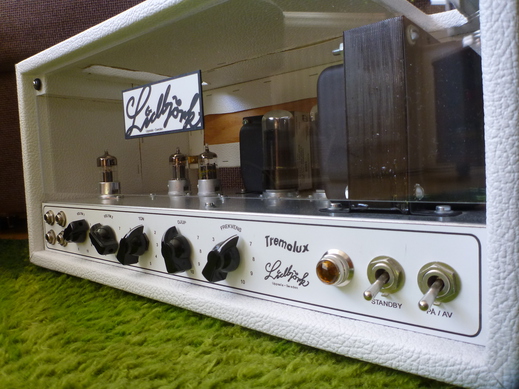
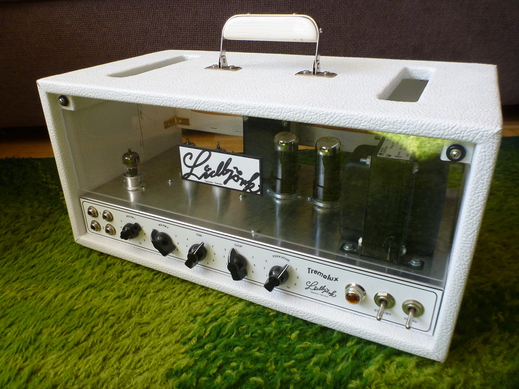
Again, I enlisted BNP Lasers for engraving the faceplate, which I drew in Illustrator. The handle is a Gibson reissue amp handle with a homemade white-painted woodpiece. The cabinet did not turn out great at first; I forgot to sand the edges, resulting in bumps under the white galon in some spots. In 2014 – ten years after I first completed the amp – I ripped the galon off, sawed two ventilation holes, sanded the wood and covered it with proper white tolex. I also replaced the plexi window with a thicker one. Finally it looks as slick as befits this machine, and the air flow is improved somewhat. (The tubes get real hot!)
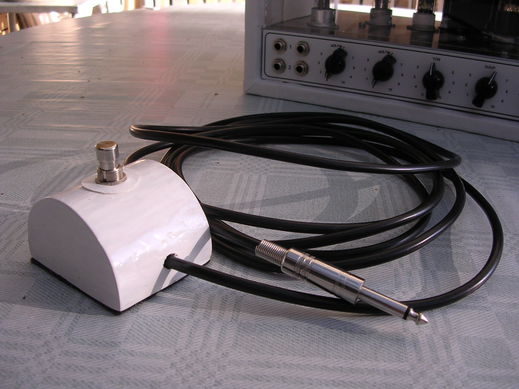
The footswitch was made from a piece of log, inspired by the wooden tremolo footswitch of a Gibson GA-40. I don't use the tremolo often, but it sounds great. In fact, the whole amp has worked like a charm ever since the first start up. It probably should be awarded for being the most reliable piece of music equipment I've had in the house for the last 10 years.
When I get the time, I'm hoping to record some new demonstration videos of all my amps. For the moment, the best way to hear my P1 and Tremolux is in my video game covers at Mutherpluckin' B, which are recorded almost exclusively with those amps.
henrik . lidbjork ✇ gmail . com
References:
AX84 Community
The Valve Wizard
Paul Ruby's Tech Info
Casey4s' Tolexing Guide
Hoffman Amps (parts store)
Tube Town (German store)
Apex Jr. (cheap surplus parts) BNP Laser Engraving
Hammond transformers
Glasklart (glazier in Sweden)
